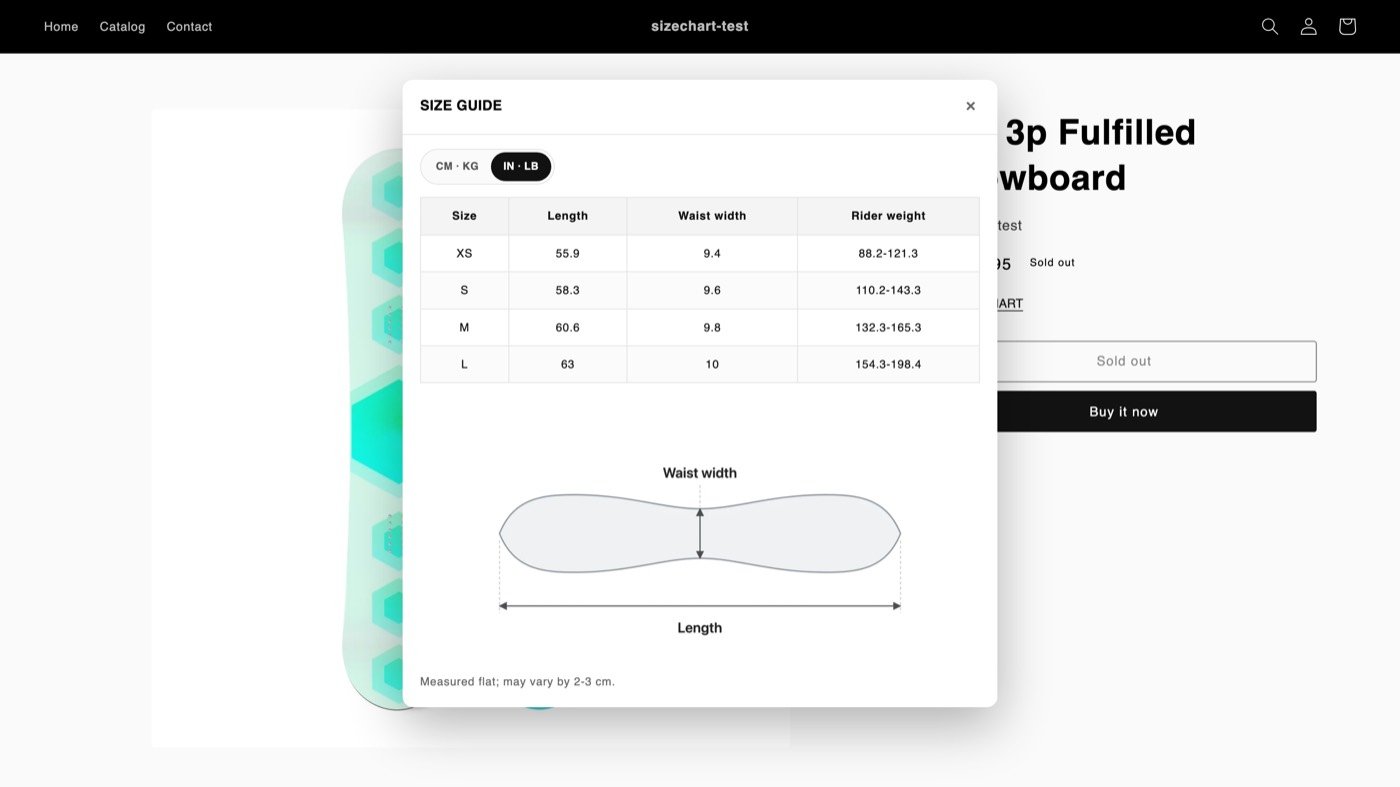
1. Getting started — add GloSize to your theme
GloSize shows a Size chart button on your product pages. Clicking it opens a popup with your size table. To turn it on:
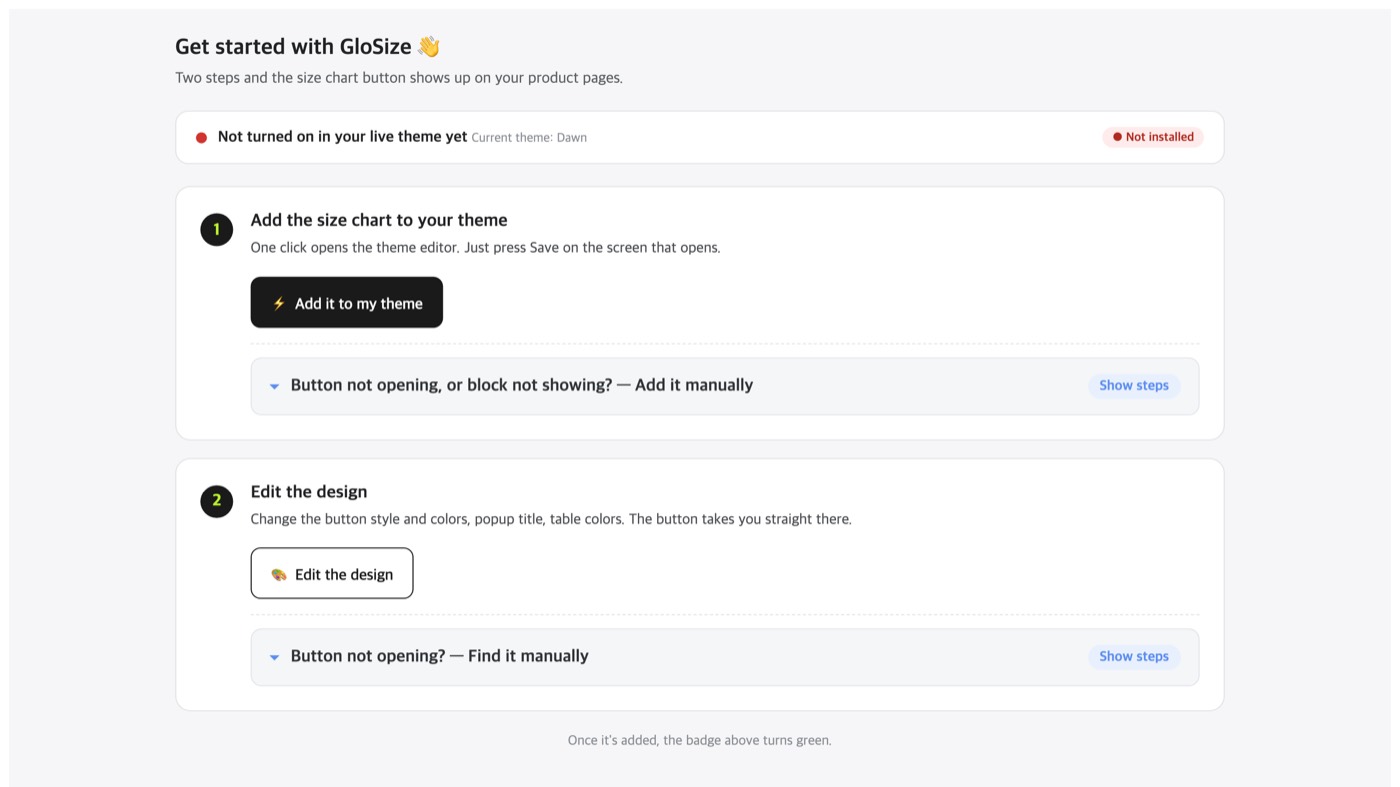
- In the GloSize app, open Get started and click “Add to theme” (this opens your theme editor at the right spot).
- In the theme editor, make sure the GloSize Size Chart block is on the product page, then click Save.
Online Store → Themes → Customize → Product template → Product information → Add block → GloSize Size Chart → Save.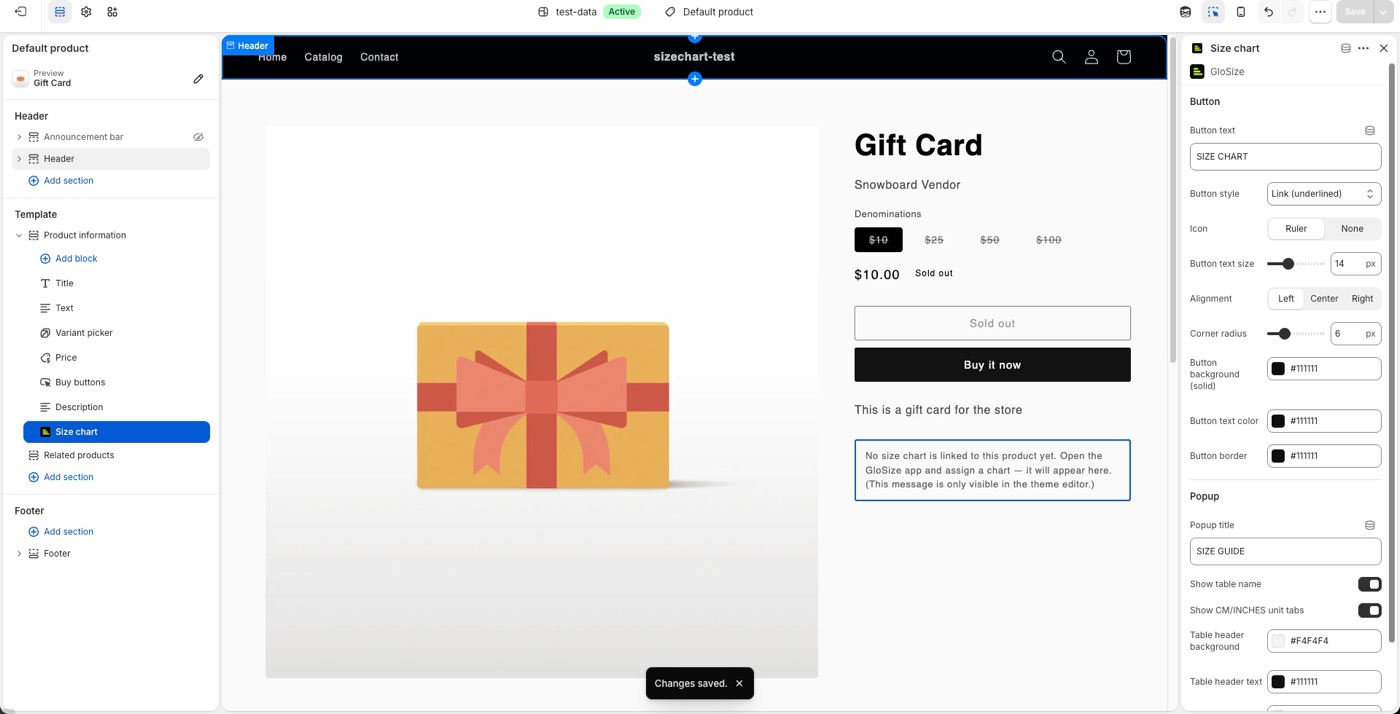
Themes: GloSize works with Online Store 2.0 themes (Dawn, Refresh, Sense, Craft, and most modern themes). Older “vintage” themes don’t support app blocks.
2. Create a size chart
- Go to New chart and pick a starter template (Tops, Bottoms, Outerwear, Shoes) or start blank. Columns and size rows are pre-filled — just type the numbers.
- Type values directly into the grid. Click a cell and enter a single value (
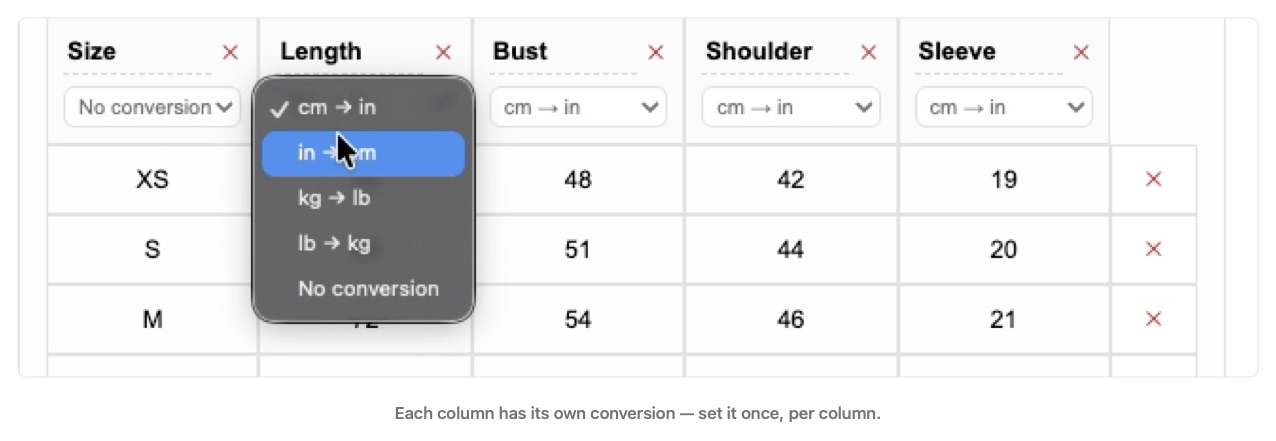
55), a range (60-64), or text. - Set each column’s unit type from the dropdown:
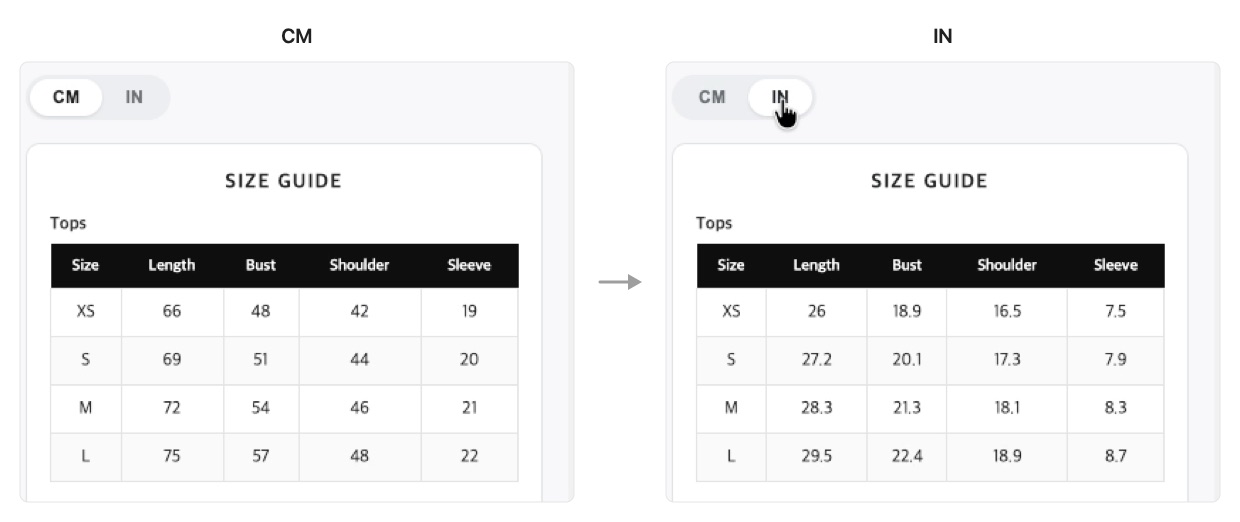
cm → in,in → cm,kg → lb,lb → kg, orNo conversion. This controls how values switch on the storefront. - Add more tables if needed (e.g., a Top table + a Bottom table) — they stack vertically in one popup.
- Optionally add a measurement image (with size control) and a footer note.
- Under Placement, choose the products or collections where this chart appears.
- Set status to Active and Save. (Draft charts are hidden from the storefront.)
3. Customize the design
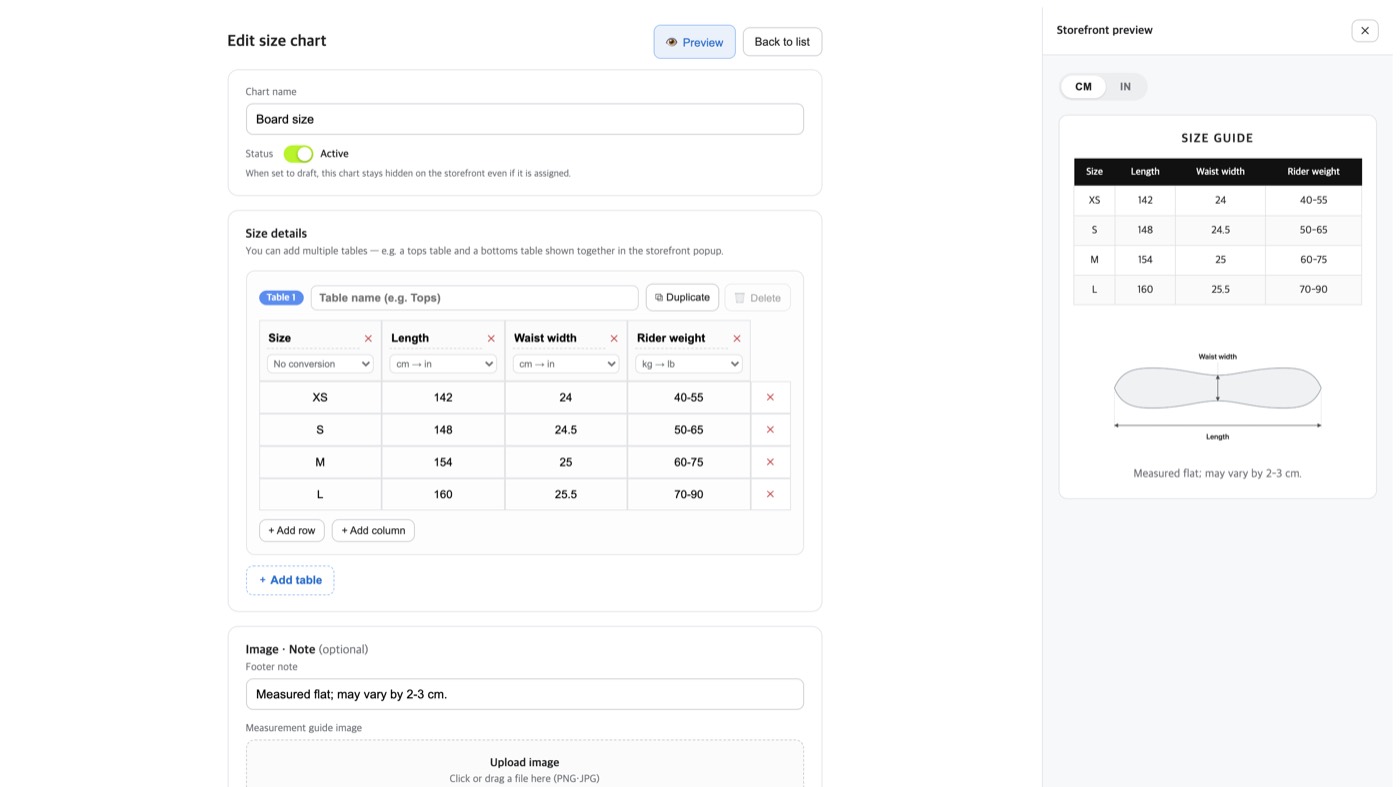
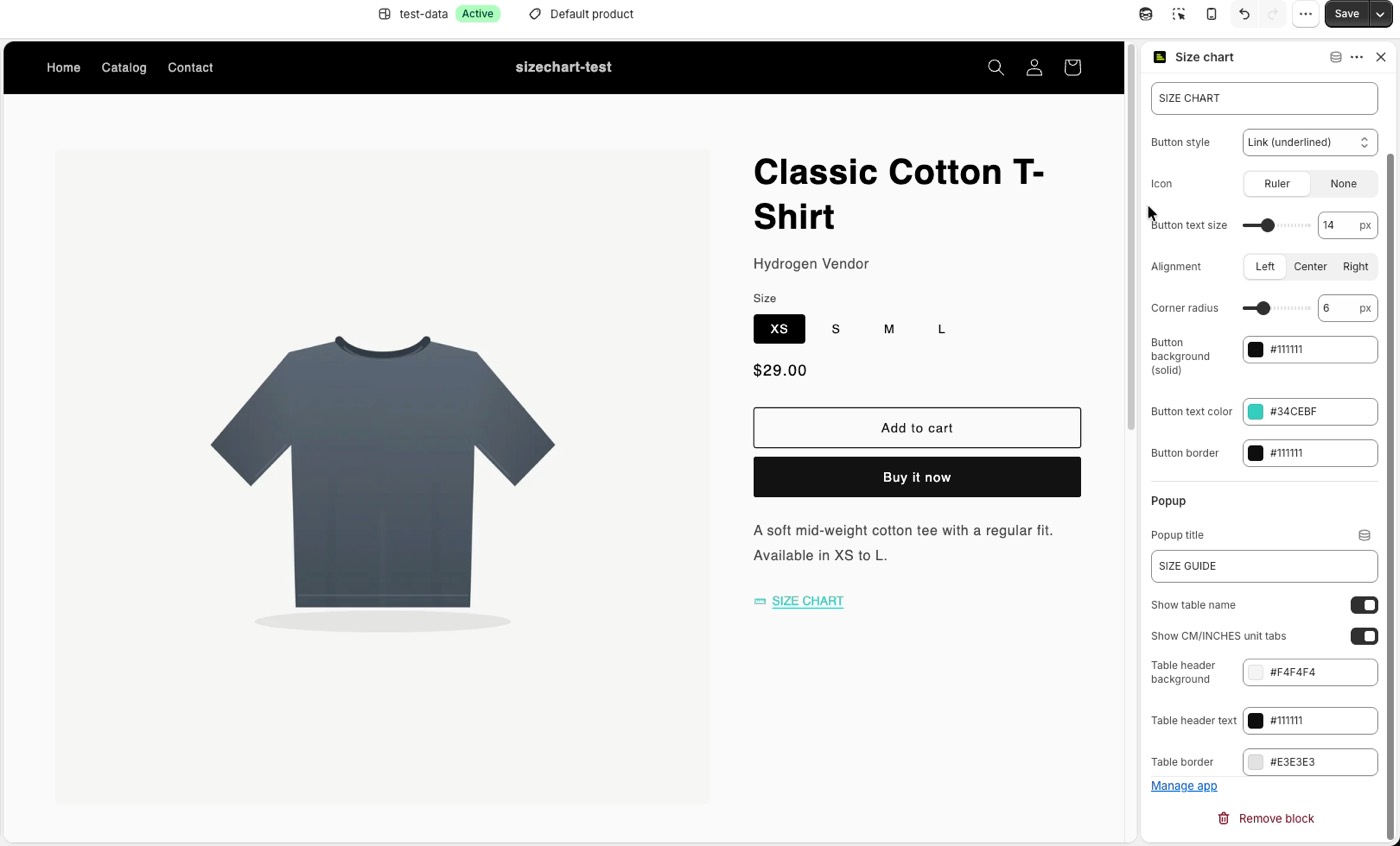
From Get started → “Edit design” (or the theme editor), click the GloSize Size Chart block. In the right panel you can set:
- Button label, style (Link / Solid / Outline), icon, size, alignment, colors, corner radius
- Popup title, show/hide table name, show/hide CM/IN unit tabs
- Table header background, header text, and border colors
Click Save in the theme editor to apply.
4. Settings
- Language — admin display language (English, 한국어, 日本語, 简体中文, Español).
- Default unit — default for new charts and the first unit shown on the storefront.
- Default footer note — auto-filled when you create a new chart.
- Footer text size — size of the note under the table in the popup.
- Export data — download all your size charts as CSV/JSON.
5. FAQ
Will GloSize slow down my store?
No. The storefront button/popup is lightweight (small script, no heavy dependencies) and loads only what’s needed.
Can one product show two tables (e.g., top + bottom)?
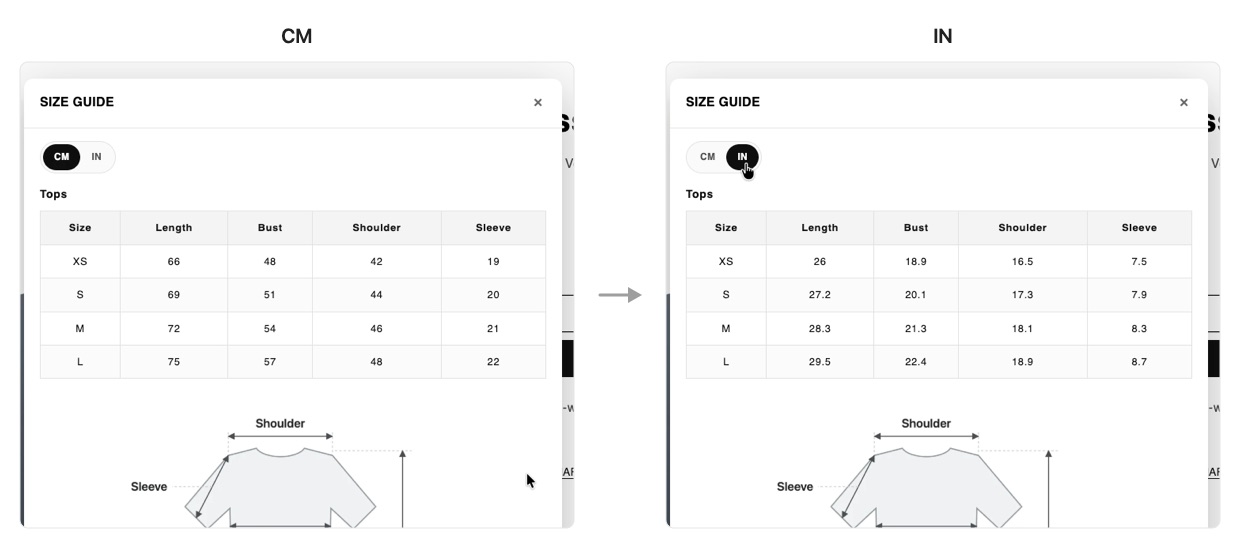
Yes. Add multiple tables in one chart and they stack in a single popup, with one shared CM/IN toggle.
How does unit conversion work?
You enter values in your base unit and set the column type. On the storefront, shoppers switch units and GloSize converts automatically (ranges convert on both ends).
The size chart isn’t showing on my product page.
Check that (1) the GloSize block is added to your product template and saved, (2) the chart’s status is Active, and (3) the chart is assigned to that product or its collection.
What happens to my data if I uninstall?
Export your charts first (Settings → Export). GloSize doesn’t modify your theme files, so removing the app simply stops the button from rendering.
Does GloSize collect customer personal data?
No. GloSize only stores your size tables and settings — no customer personal information.